
Brief
Re-billing makes for a great value-add and additional revenue source. We have witnessed some agencies add $20-30k topline to their monthly revenue just with re-billing for usage. Re-billing works by using a double wallet system. Meaning your workspace has a usage wallet and the sub-account has a usage wallet. As sub-account use services like voice AI, the usage ($0.07 * mins) is recorded as an expense to the workspace’s wallet. If the sub-account is being re-billed, the sub-account will ALSO receive an expense to their wallet. Each wallet will pay down based on usage and re-filled based on the auto-refill parameters.Video Overview
https://youtu.be/rnohXnrfSCYHow To Connect to Stripe:
-
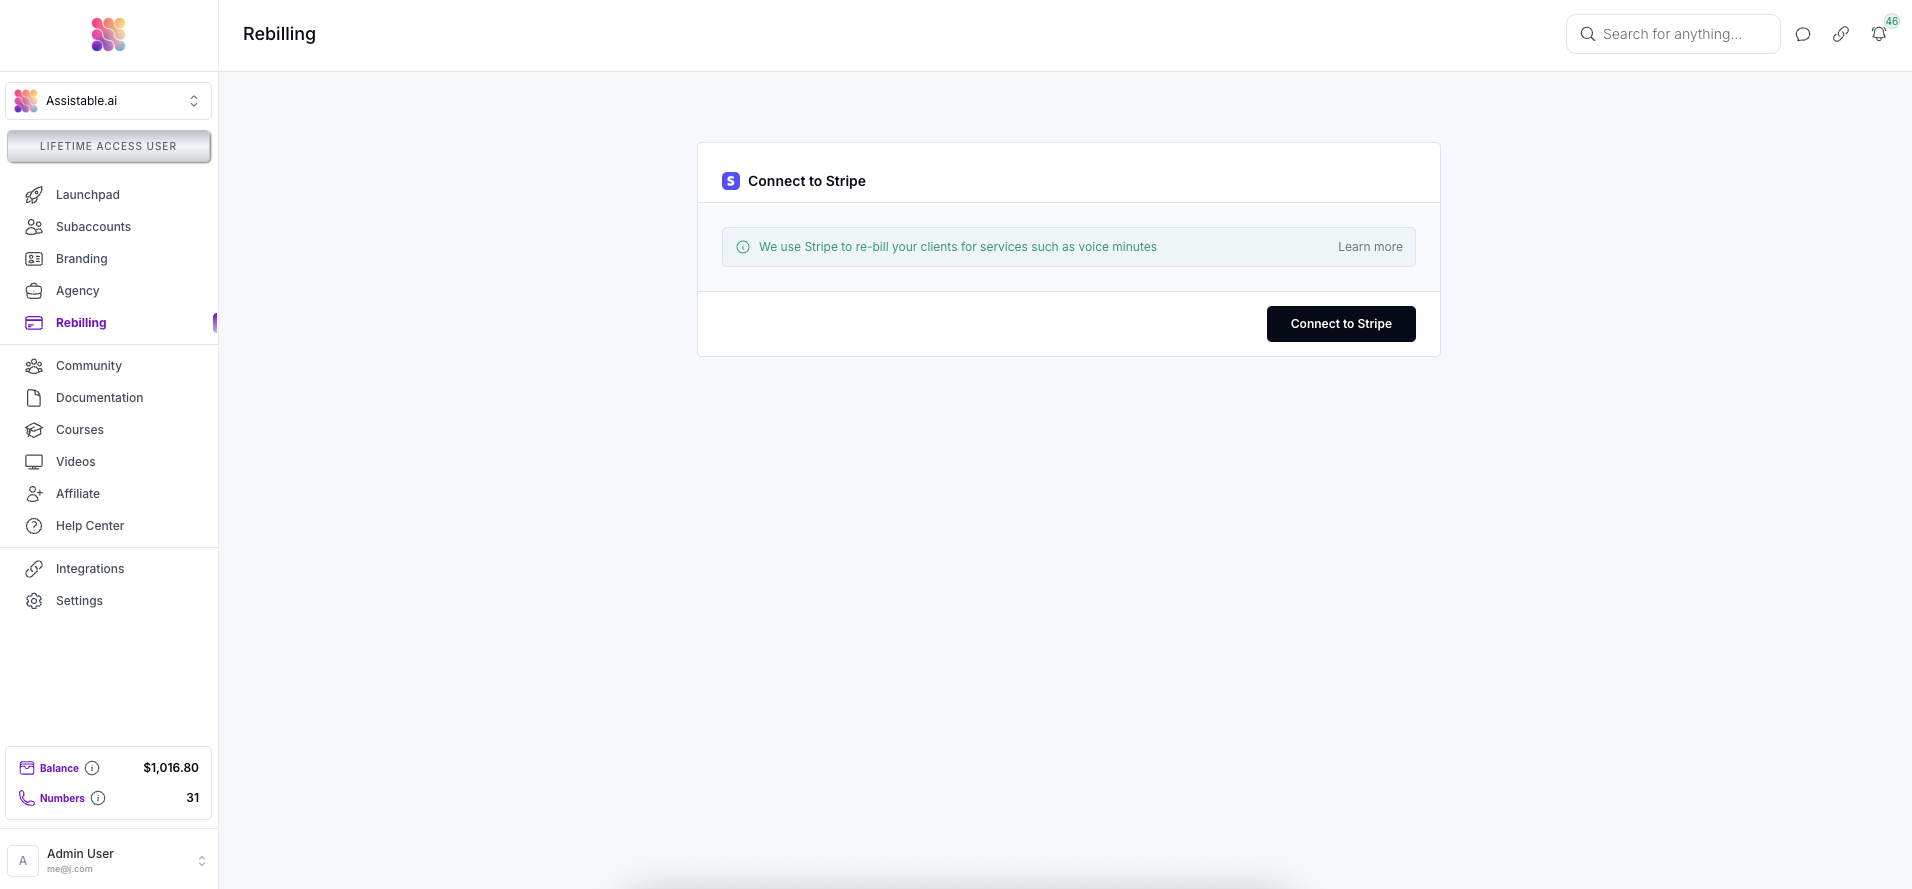
Navigate to the ‘Re-billing’ tab in your workspace (https://assistable.ai/dashboard?page=rebilling | https://createassistants.com/dashboard?page=rebilling) and click on ‘Connect to Stripe’. This is a Stripe oauth connection that will allow us to bill sub-accounts on behalf of your account.
-
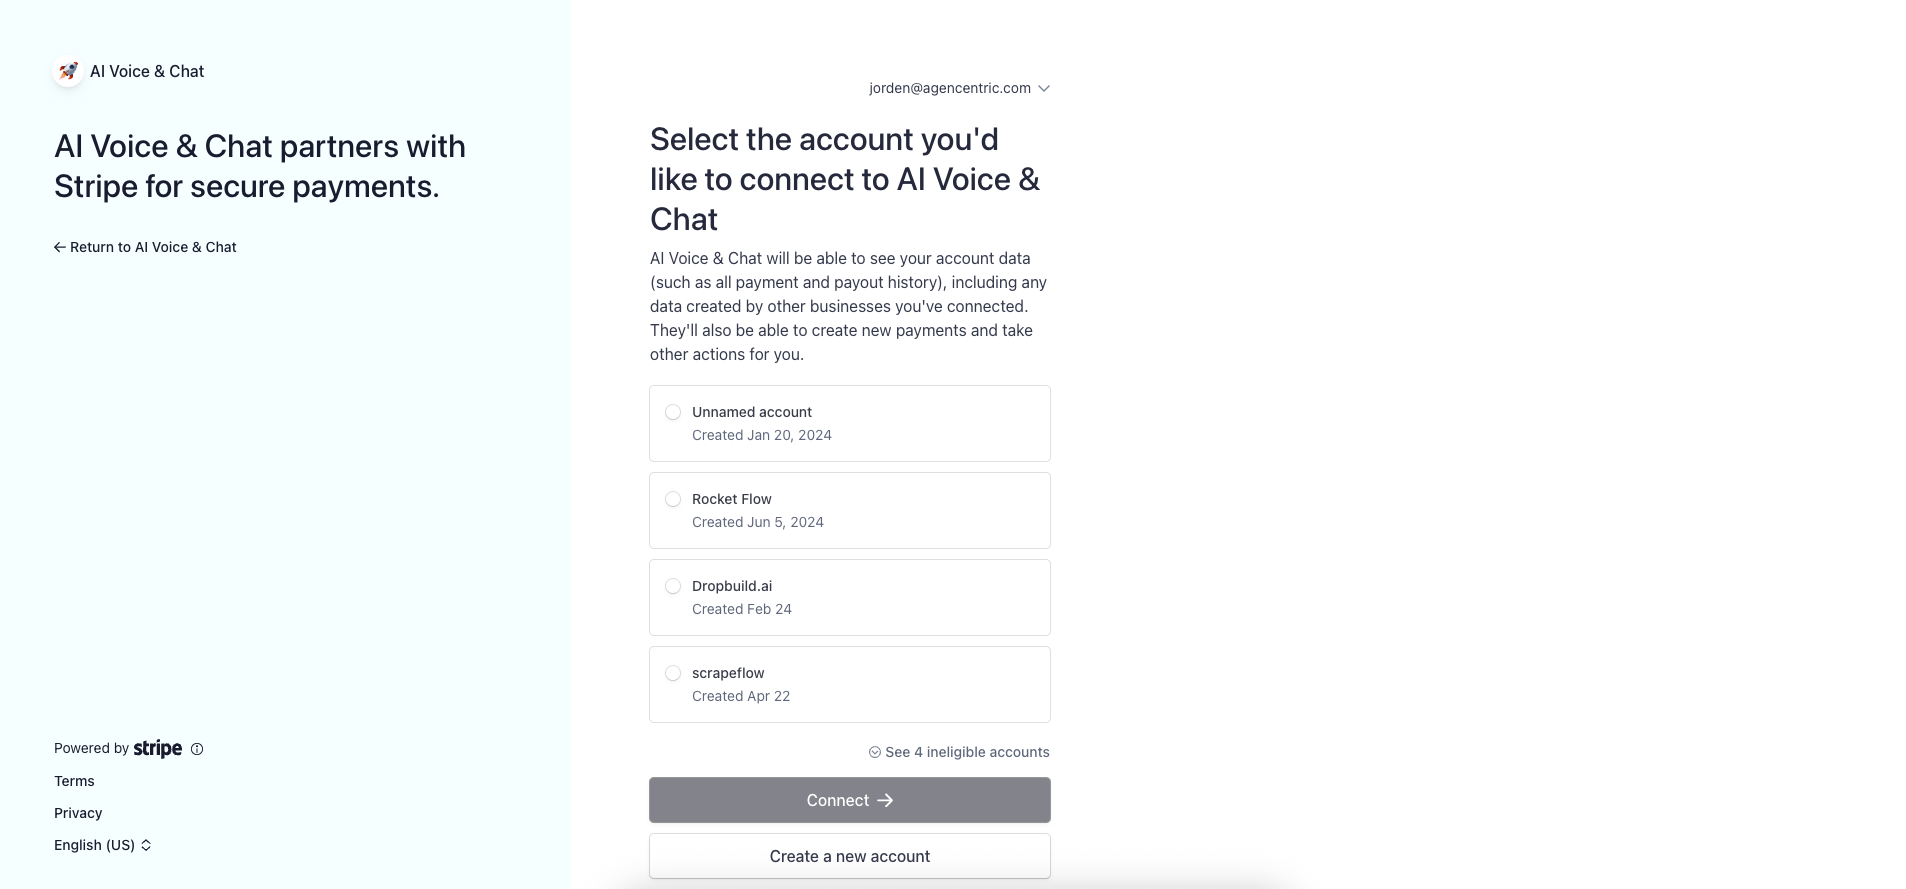
Select the eligable Stripe account to connect to your workspace, and then click ‘Continue’. Afterwards, you will be brought to the Stripe oauth page - there is nothing you need to do here - you will be redirected back to your workspace.
-
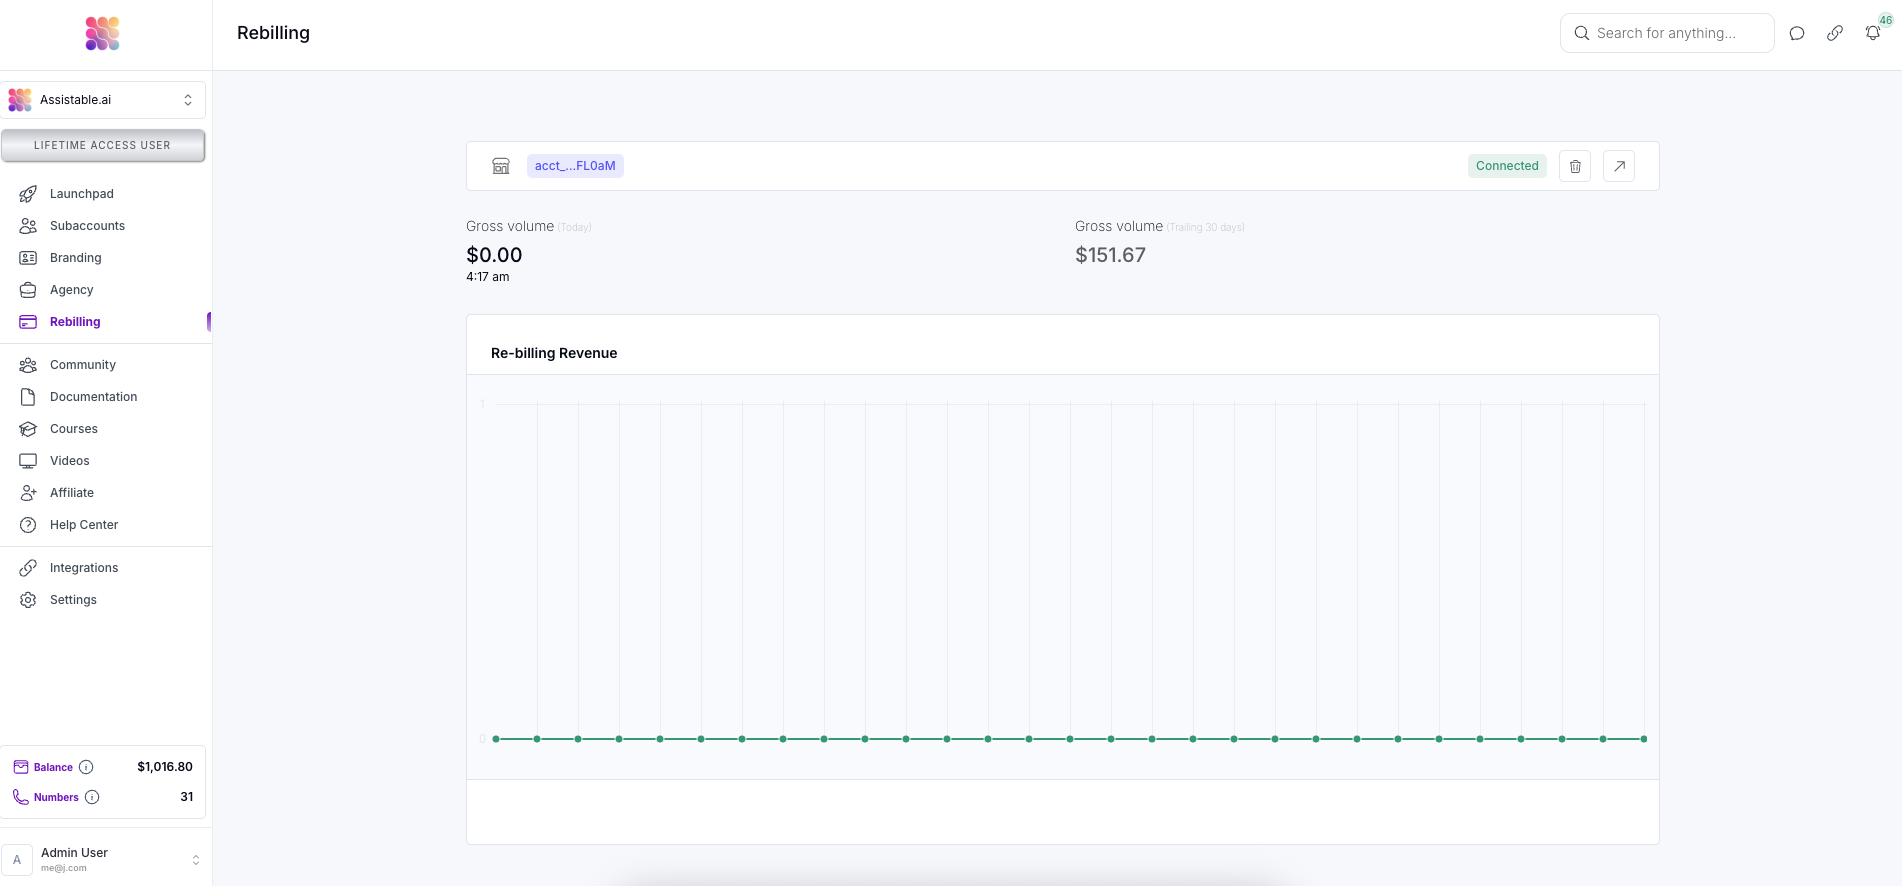
You now have an active Stripe connection with your workspace.
Enabling Re-billing In Sub-accounts
To enable re-billing to a sub-account there is a couple of things we need to do in order to make sure management is secure and done correctly. Once this is done, the usage will begin to be billed to the sub-accounts wallet and re-filled from your Stripe account. Access and usage (403 errors) will also be dictated from the sub-account level now, as well as from the workspace as opposed to just the workspace. This allows you to make sure your clients aren’t making calls with $0 or negative wallet balance.-
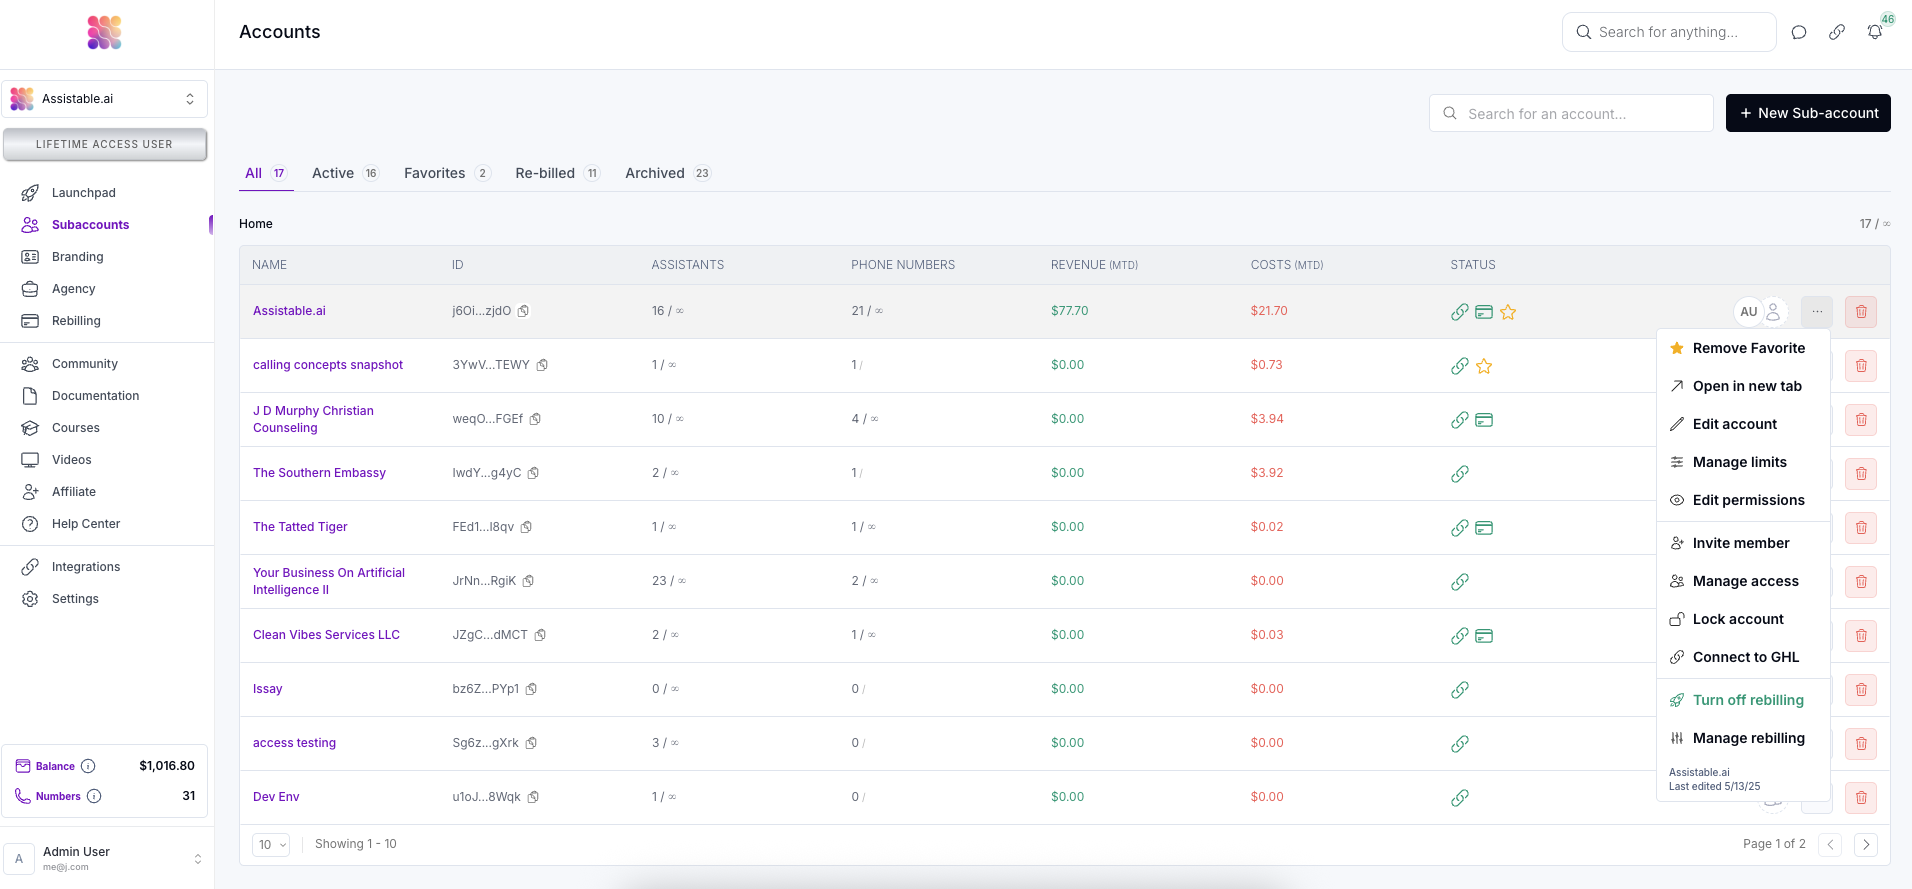
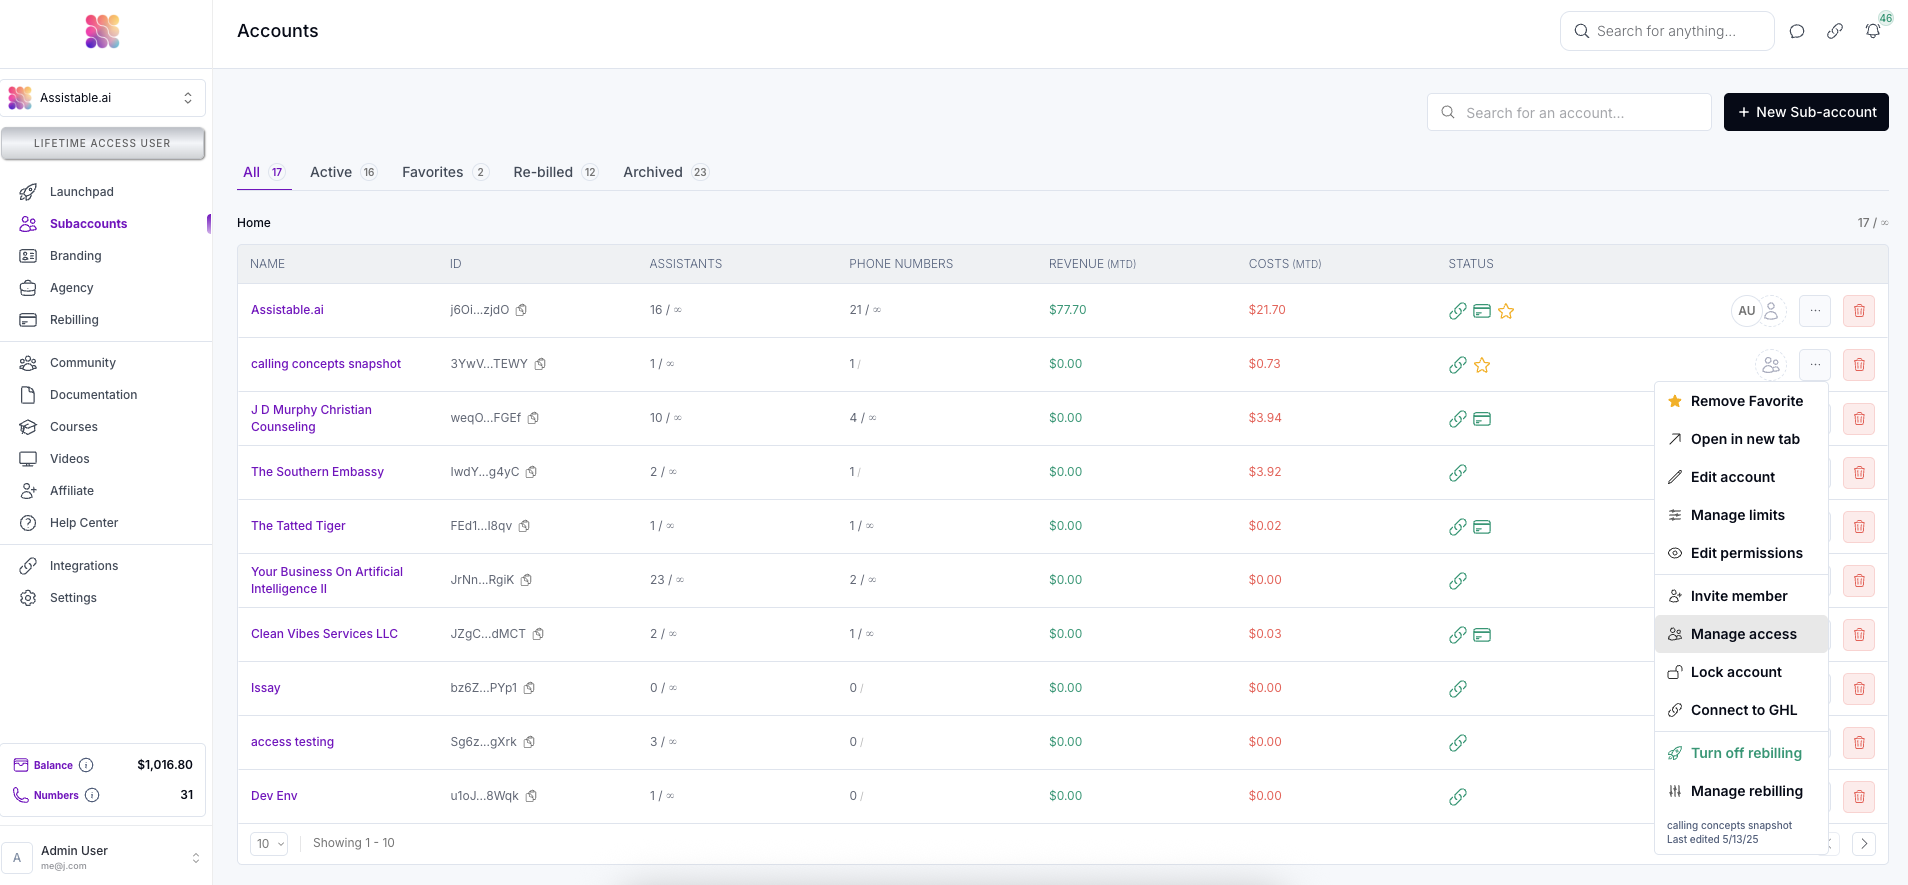
Visit the sub-accounts tab in your workspace (https://assistable.ai/dashboard?page=accounts | https://createassistants.com/dashboard?page=accounts). On any of your sub-accounts, click on the manage button (3 dots) to open the menu.
-
Click ‘Turn on Re-billing’ in the menu to enable re-billing for the sub-account. Then, click into ‘Manage rebilling’ to configure your rebilling settings.
- This can also be done in the agency settings in the new account snapshot so all newly created accounts in your workspace will automatically have this enabled.
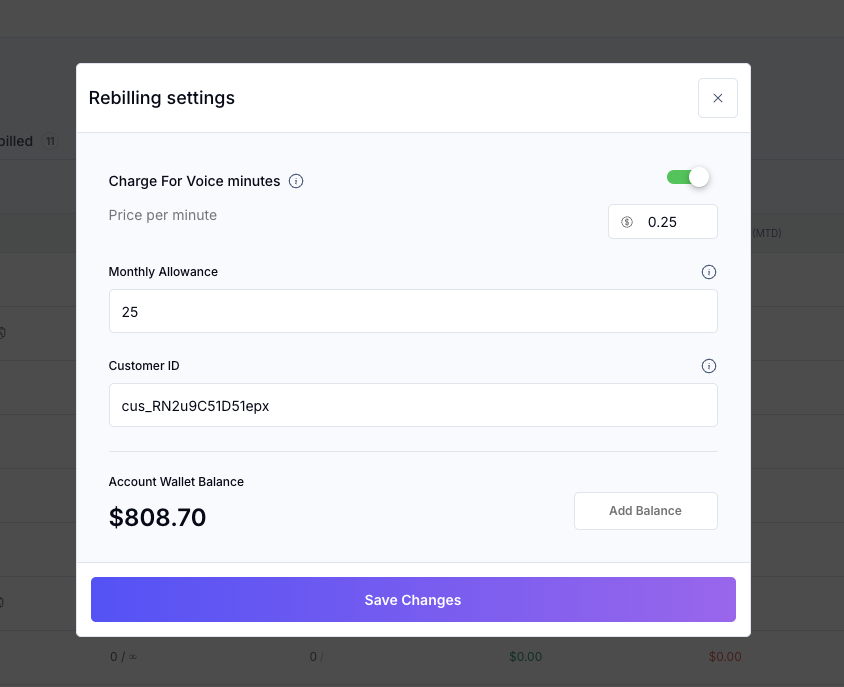
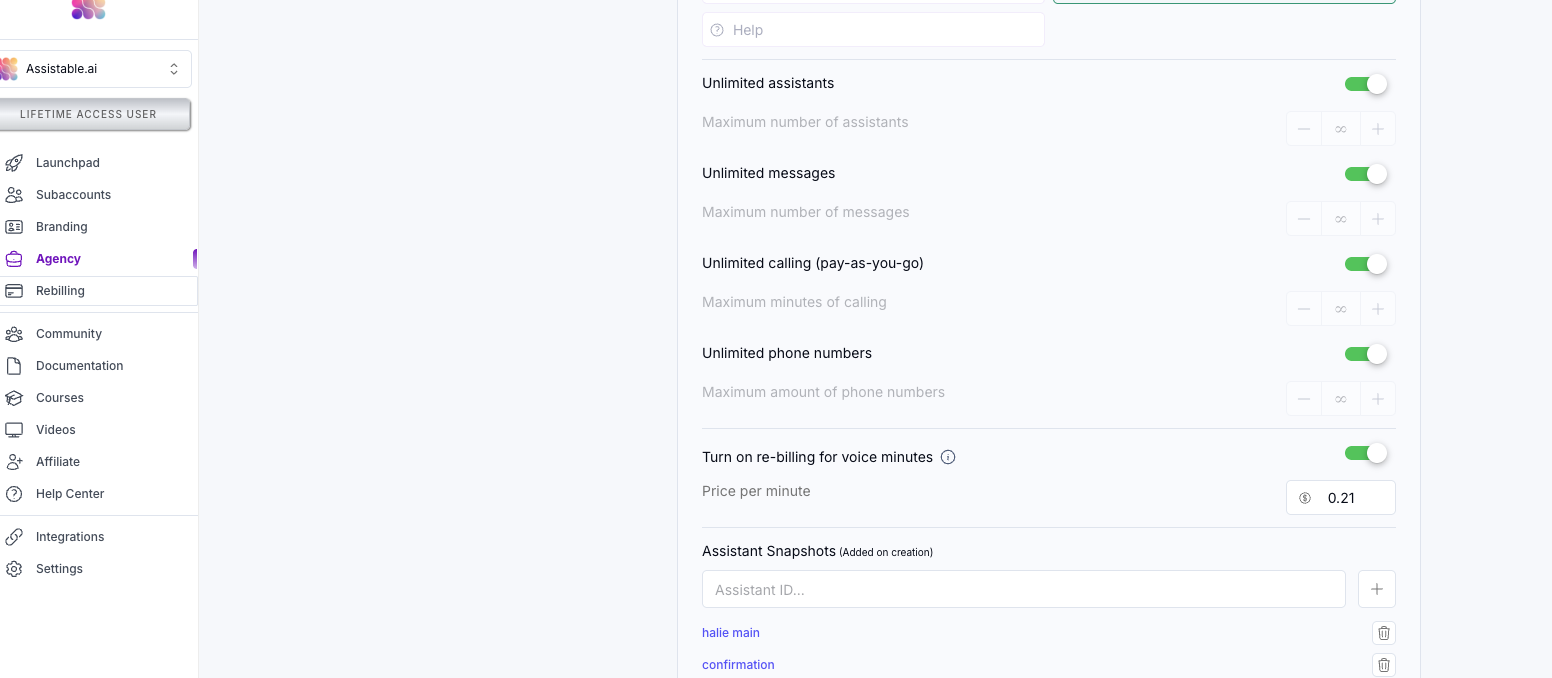
- Enable rebilling for voice minutes and input the price per minute. You can also add balance here if needed. This does NOT tangibly charge anyone in the ledger; however you are foregoing that amount of re-billing.
-
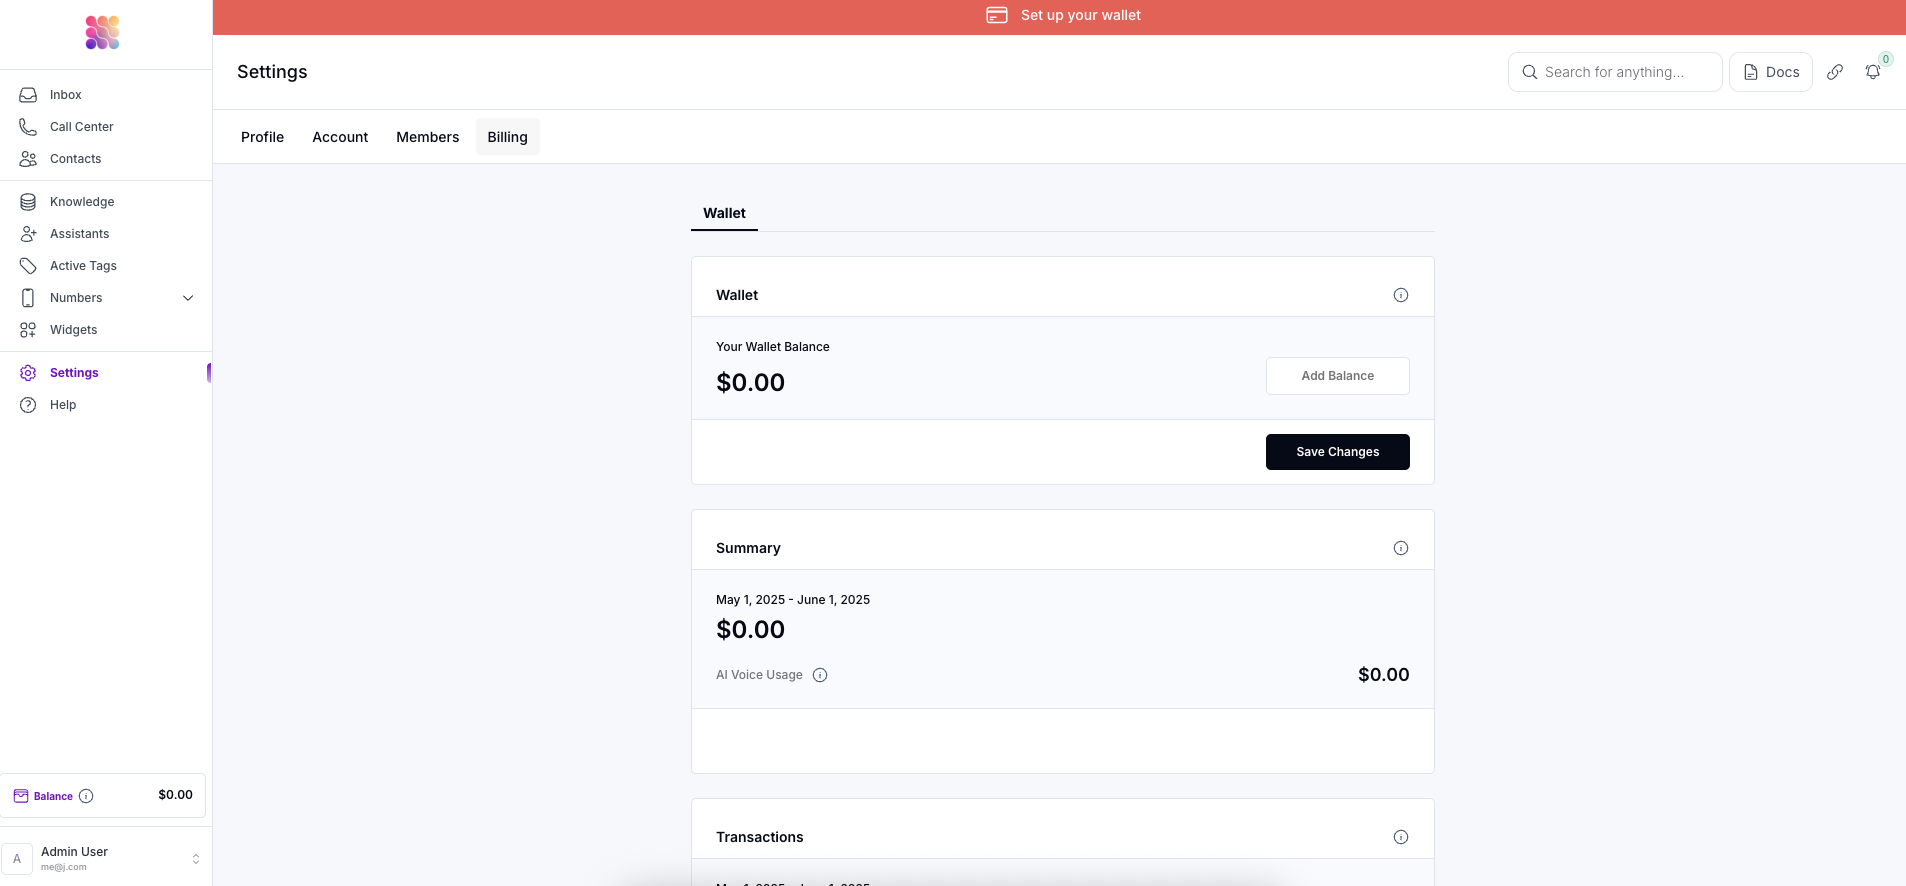
In the sub-account settings, we need to go to the billing tab. Here we can add our initial balance as the client (or have the client do this). Afterwards, the client can configure the card number and re-fill settings for their wallet.
-
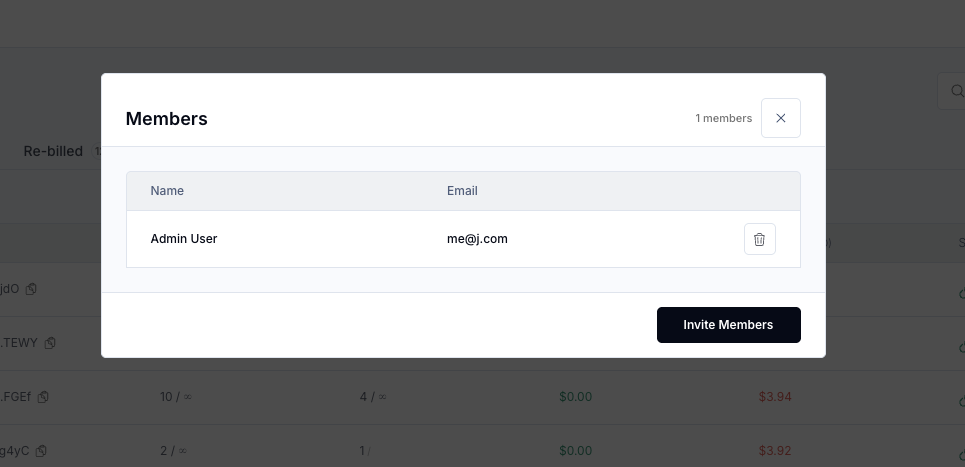
If you do not see the billing tab in the sub-account settings, its because you are not an authorized user. Add your self as an authorized user by clicking the user icon in the sub-account or under the manage menu click on ‘manage access’. Add yourself and any user / client that would need to manage billing.
-
If you do not see the billing tab in the sub-account settings, its because you are not an authorized user. Add your self as an authorized user by clicking the user icon in the sub-account or under the manage menu click on ‘manage access’. Add yourself and any user / client that would need to manage billing.